Nazuki Recipe
ნაზუქი
A home-oven nazuki recipe: a soft yeast dough rich with milk, matsoni, butter and eggs, spiced with cinnamon and cloves and full of raisins, then glazed twice with yolk for a shiny brown top. It makes six loaves for tea, breakfast or a long drive.
Recipe by the Maspindzeli team in Tbilisi · Updated 19 Nov 2026 · From Surami in Shida Kartli, and home kitchens across Kartli
Full recipe with the timeline, timers and US measures: maspindzeli.ge/recipes/nazuki/
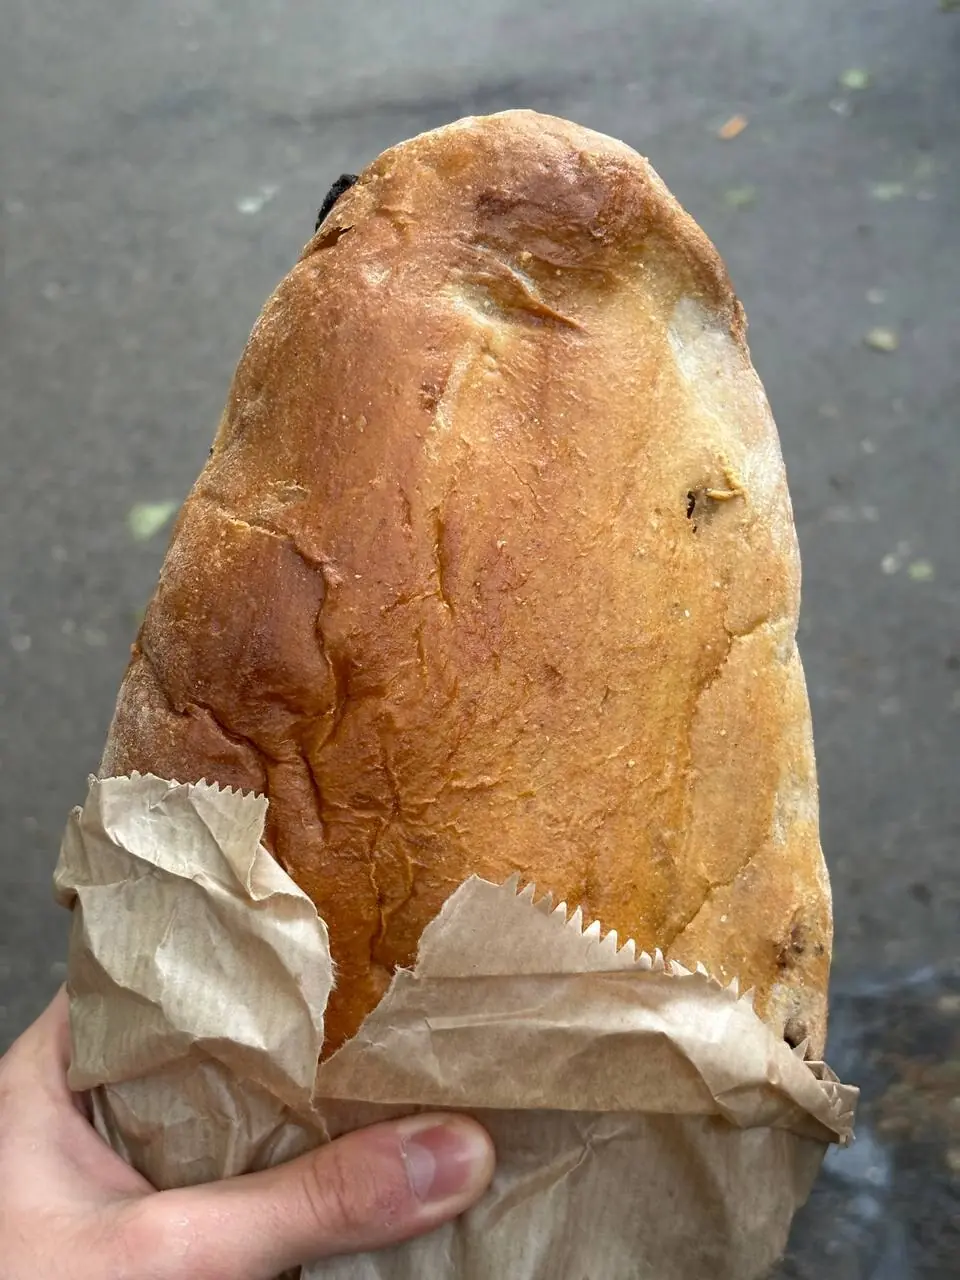
This nazuki recipe recreates the sweet, spiced raisin loaves that come out of the clay ovens at Surami, adapted to an ordinary home oven. The dough is soft and rich: warm milk, matsoni, melted butter, eggs and a good amount of sugar, with ground cinnamon and cloves for that unmistakable smell and raisins worked through at the end. Two coats of egg yolk give the crust its dark, polished shine. You will often hear it called Surami nazuki; you will also see it spelled nazuqi, and in Georgian it is ნაზუქი.
Nazuki has long been a festive bread in Kartli, where many families bake it for Easter, and the bakers' stalls at Surami later made it everyday food for travellers on the road west. Our guide to Georgian bread tells that story and explains where to stop for a loaf; this page shows how to make nazuki in your own kitchen.
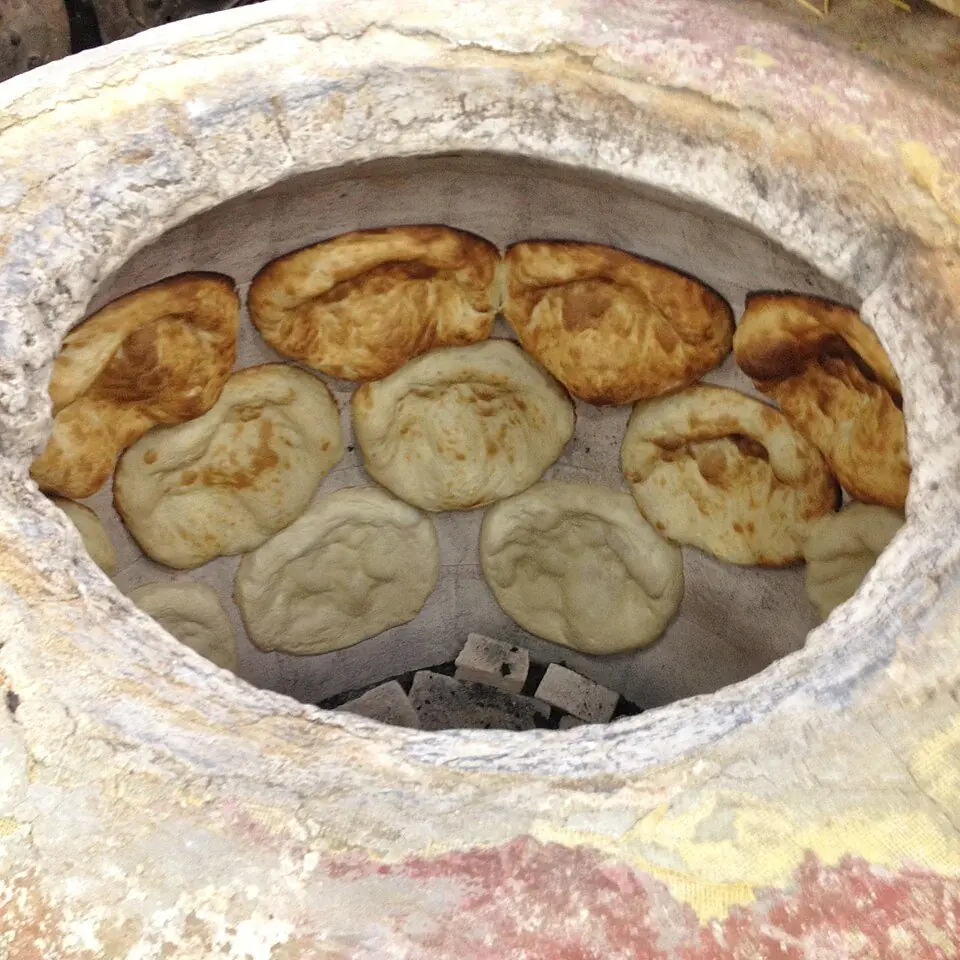
At Surami the loaves are pressed onto the hot inner wall of a tone and lifted out a few minutes later. A home oven bakes more gently, so this recipe adds a rise after shaping and uses a moderate 200 °C oven. Allow about 4 hours 45 minutes from start to finish; most of that is the dough rising while you get on with something else.
Timeline: what to do, and when
4 h 45 min from start to table · 1 h 5 min hands-on · 3 h 25 min waiting
Each bar is one step. Hands-on Waiting, while the oven, the pot or the dough does the work. Steps that sit inside a wait are done in parallel.
Recipe
Nazuki
Ingredients
Dough
Raisins
Glaze
Amounts are scaled. Times stay about the same, but a bigger pot takes a little longer to come to the boil.
Contains: gluten (wheat), milk, egg.
You will need
- Kitchen scales
- Small saucepan
- Small frying pan
- 2 large mixing bowls
- Stand mixer with a dough hook (optional)
- 2 large baking trays lined with baking paper
- Clean tea towels
- Pastry brush
- Wire rack
- Kitchen thermometer (optional)
Method
- Wake up the yeast5 min hands-on· start here
Warm the milk in a small pan until it feels comfortably warm on your wrist, about 37 °C / 100 °F; above 45 °C / 115 °F it starts to harm the yeast. Pour it into one of the large bowls and stir in the yeast, 1 tsp of the sugar and 2 tbsp of the flour.
- Let the yeast foam15 min waiting· starts at +5 min
Cover the bowl and leave it somewhere warm for about 15 minutes, until the surface is frothy and full of bubbles. If nothing has happened after 20 minutes, the yeast is too old: start again with a fresh packet.
- Plump the raisins, melt the butter10 min hands-on· starts at +7 min, during step 2
Rinse the raisins in warm water, drain them and pat them very dry with a clean towel. Warm 1 tbsp of the oil in the small frying pan over medium-low heat and stir the raisins in it for 1 to 2 minutes, just until they swell and turn glossy, then tip them onto a plate to cool. Melt the butter gently and leave it until barely warm.
- Mix the dough10 min hands-on· starts at +20 min
Stir the rest of the sugar into the foaming yeast until it dissolves, then add the matsoni, beaten eggs, cooled butter and vanilla and whisk until smooth. In the second bowl, combine the remaining flour with the salt, cinnamon and cloves. Add this to the liquid in three lots, stirring with a wooden spoon and then with your hand, until no dry flour is left and you have a soft, shaggy dough.
- Knead until smooth12 min hands-on· starts at +30 min
Turn the dough onto a lightly floured worktop and knead for 10 to 12 minutes, or 7 to 8 minutes with a dough hook on low to medium speed, until it is smooth, stretchy and only slightly tacky. It should stay softer than plain bread dough. Rub a little oil on your hands rather than piling on flour, and add up to 50 g more flour only if it still clings to everything after 5 minutes.
- Work in the raisins3 min hands-on· starts at +42 min
Press the dough out flat with your fingers, sprinkle the cooled raisins on top, then roll and fold it over itself, kneading lightly for a minute or two until the fruit is evenly mixed in. Shape it into a ball, put it in a lightly oiled bowl and turn it once so the top is coated. Cover with a damp tea towel.
- First rise1 h 30 min waiting· starts at +45 min
Leave the dough in a warm spot out of draughts, ideally 24 to 27 °C / 75 to 80 °F, until it has doubled in size: about 90 minutes, sometimes up to 2 hours. Sugar and butter slow the yeast down, so go by the size of the dough rather than the clock. An oven with only its light switched on makes a good proving box.
- Knock it back5 min hands-on· starts at +2 h 15 min
Rub the last of the oil over your hands, press the dough down to let the gas out and knead it a few times in the bowl, the way Georgian home bakers do between rises. Cover it again.
- Second rise40 min waiting· starts at +2 h 20 min
Let the dough rise for about 40 minutes more, until it is puffy and close to double again. Meanwhile line two large baking trays with baking paper.
- Divide and shape15 min hands-on· starts at +3 h
Turn the dough out and cut it into 6 equal pieces of about 285 g; weighing them helps them bake evenly. Round each piece into a tight ball with the seam underneath, roll it under your palms into an oval about 16 cm long, then press it down to about 2.5 cm thick, like a plump, flattened bean. Push any raisins showing on the surface back inside, as they burn in the oven. Put 3 loaves on each tray, at least 6 cm apart.
- Final rise40 min waiting· starts at +3 h 15 min
Cover the loaves loosely with tea towels and leave them for 35 to 45 minutes, until they have grown by about half and a gentle fingertip press fills back slowly. About 20 minutes into this rise, switch the oven on at 200 °C / 390 °F (fan 180 °C / 355 °F) and set a shelf in the middle.
- Glaze twice5 min hands-on· starts at +3 h 55 min
Beat the yolk with the milk and the pinch of sugar. Brush a thin coat over the top and sides of each loaf, wait 3 minutes, then brush on a second coat. Keep the glaze off the paper, where it glues the loaves down and scorches.
- Bake25 min waiting· starts at +4 h
In a fan oven, bake both trays together for 20 to 25 minutes, swapping them over after 12 minutes, until the loaves are a deep, shiny chestnut brown and sound hollow when tapped underneath (about 90 °C / 195 °F in the centre). If they darken too fast, rest a sheet of foil loosely on top for the last 5 to 10 minutes. If your oven has no fan, the trays go in one after the other at 200 °C / 390 °F, the second waiting somewhere cool; allow about 25 minutes extra.
- Cool20 min waiting· starts at +4 h 25 min
Lift the nazuki onto a wire rack and leave them for at least 20 minutes before you cut them, so the crumb can set. They are at their softest while still slightly warm.
About 445 kcal per serving (half a loaf, 1 of 12). This is an estimate from standard values for the ingredients, not a lab figure.
Tear it open with your hands while it is still a little warm, the way people do in the car after a stop at Surami. Once cool, cut it into thick slices; it needs nothing spread on it.
Tips, swaps and variations
Tips from your host
- Weigh the flour and liquids instead of using cups. This dough is meant to be soft, and an extra handful of flour is the most common reason for a heavy, dry nazuki.
- Fry the raisins only until they swell. That way they stay juicy inside the crumb, and any that end up on the surface are less likely to blacken; still, push stray ones back in before baking.
- Sweet, buttery doughs rise slowly. In a cool kitchen, stand the bowl in the oven with just the light on, or near a radiator rather than on it, and give it the full 2 hours if it needs them.
- Do not skip the rise after shaping. A tone hits the loaves with a fierce burst of heat that makes them spring up at once; a home oven needs those extra 40 minutes or the crumb stays tight.
- Two thin coats of yolk give a deeper, more even shine than one thick coat, which pools in the dips and bakes patchy.
- A crust with this much sugar colours quickly. Look at the loaves after 15 minutes and cover them loosely with foil once the tops are as dark as you like.
Variations and swaps
- Raisin line, as in one Kartli home recipe: knead the dough without raisins. After dividing, flatten each piece, lay a strip of raisins down the middle, fold the dough over them, pinch the seam shut and shape the loaf seam side down. Every slice then has raisins in its centre.
- Plain nazuki: some Georgian families bake it without raisins, and an older version from Soviet times adds 1 tsp ground coriander seed to the spices and presses rows of thumb dimples into the tops before glazing.
- Honey instead of sugar: use 150 g runny honey in place of the 200 g sugar and cut the milk to 220 ml. Honey browns faster, so check the loaves after 15 minutes.
- More spice: a pinch of ground cardamom or a little freshly grated nutmeg, up to 1/4 tsp, sits well with the cinnamon and cloves. Some bakers use them; others say they do not belong.
- Without matsoni: plain full-fat yoghurt works the same way, and soured cream, used in some Georgian home recipes, makes a slightly richer crumb. For an all-milk dough, use 340 ml milk in total.
- Small buns: divide the dough into 12 pieces of about 140 g, shape them into small ovals or rounds and bake for 15 to 18 minutes. One classic Georgian cookbook shapes nazuki as small round loaves like these.
- With oil: use 70 ml sunflower oil in the dough instead of the butter, as some Georgian recipes do. The crumb is a little lighter and less rich.
Serve it with
- A glass of strong black tea
- A small cup of coffee
- Butter, honey or fruit preserves (muraba) on day-old slices
- Red-dyed eggs and the other dishes of a Kartli Easter table
Make ahead and storage
Wrap the cooled loaves in a clean cotton or linen cloth, or put them in a paper bag inside a bread bin, and keep them at room temperature for up to 3 days; the fridge turns them stale faster. From the second day, nazuki is good sliced and toasted, or warmed for 5 minutes in a 160 °C / 320 °F oven. For longer storage, freeze the loaves well wrapped for up to 2 months and thaw them at room temperature. To bake first thing in the morning, leave the kneaded dough, raisins and all, to rise slowly overnight in the fridge, covered, then give it about an hour at room temperature before shaping.

Maspindzeli Travel, Tbilisi · private tours and cooking classes in Georgia · maspindzeli.ge · WhatsApp +995 598 74 74 54 · hello@maspindzeli.ge